
 Services
 Portfolio
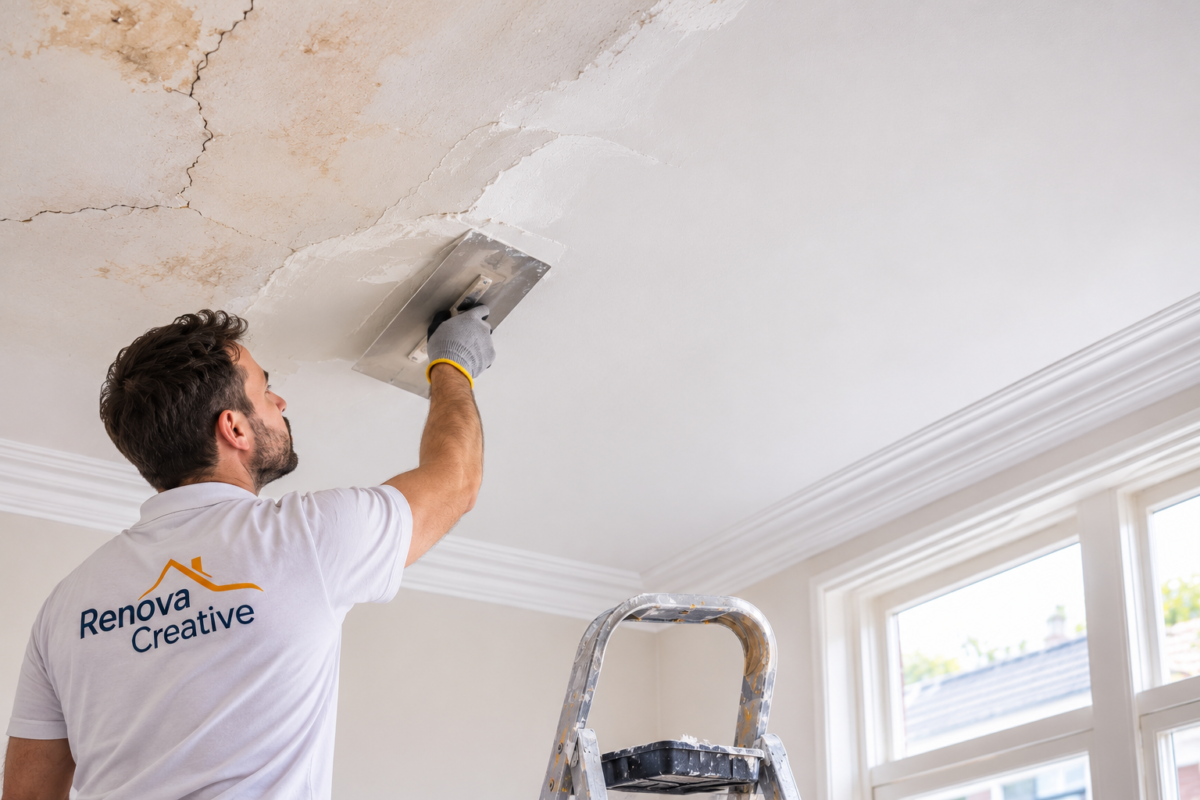
A damaged ceiling can change the feel of an entire room. Cracks, water stains, peeling paint and loose plaster are more than cosmetic problems: they may point to movement, moisture or a failing surface. A proper ceiling repair Den Haag project starts by identifying the cause, then selecting a repair method that suits the ceiling and the condition of the existing finish.
Homes in Den Haag range from older apartments and town houses to newer family properties. Their ceilings can differ in construction, previous repairs and materials. A fine hairline crack needs a different solution from a water-damaged plasterboard ceiling or large areas of detached plaster. This guide explains what to inspect, which repairs may be suitable and how to plan the work.
Ceiling repair Den Haag: signs your ceiling needs attention
Not every small mark requires a complete renovation. However, changes should be checked before they spread. Fine cracks may result from normal building movement. A crack that becomes wider, returns after filling or runs diagonally across a ceiling deserves closer inspection.
Look for brown or yellow stains, bubbling paint, sagging sections, powdery surfaces and plaster that sounds hollow when gently tapped. These signs can indicate moisture, poor adhesion or damage behind the visible finish. If a ceiling is sagging, feels unstable or is shedding material, keep people away from the area and arrange a professional inspection.
A ceiling repair Den Haag job is most effective when it addresses the underlying defect as well as the visible damage. Filling a crack or applying fresh paint without checking the cause can lead to the same problem returning.
Ceiling repair Den Haag: common causes of ceiling damage
1. Building movement and hairline cracks
Buildings respond to temperature changes, humidity and normal structural movement. Small cracks can appear where different materials meet, such as at plasterboard joints or around a ceiling and wall connection. A stable hairline crack may only need suitable filling and reinforcement. A wide, growing or recurring crack should be assessed before cosmetic work begins.
2. Leaks and moisture
Water stains may come from a roof, plumbing connection, bathroom above the room or condensation. The visible mark is not always directly below the source because water can travel along pipes, joists or other building elements. Repair the leak first, then allow the ceiling and surrounding structure to dry properly. Painting over damp plaster does not solve the source of the problem.
3. Loose or failing plaster
Plaster can lose its bond because of moisture, a weak substrate, poor preparation or age. Bubbling, flaking, hollow sounds and pieces falling away are warning signs. New plaster should not be applied over loose material. The unstable layer needs to be assessed and removed safely before the surface is rebuilt.
4. Ageing paint and previous repairs
Old paint may chalk, peel or separate from the surface. Earlier patch repairs can also show through as raised edges, different textures or colour differences. Several layers of paint may hide defects until the surface is examined closely. Good preparation helps distinguish a paint issue from damage in the plaster underneath.
What to inspect before a ceiling repair Den Haag project
Start with a visual inspection in daylight. Then use a bright lamp held at a shallow angle to reveal uneven areas, ridges and small cracks. Photograph the damaged sections and note when they first appeared. Record whether the marks are changing, whether they become worse after rain and whether there has been a recent leak.
Check accessible areas above the ceiling only when it is safe to do so. Look for signs of leaking pipes, roof defects or condensation. Do not poke, cut or pull at unknown ceiling materials. Older buildings may contain materials that require specialist assessment before drilling, sanding or removal.
Asbestos cannot be reliably identified by appearance alone. If the ceiling or its insulation may contain asbestos, stop work and arrange an assessment by a qualified specialist. The Dutch government provides official guidance on asbestos policy and safe handling. Do not sand or remove suspect materials yourself.
Once the inspection is complete, identify the type of problem. Is the damage limited to the paint? Has the plaster lost its bond? Is a plasterboard joint opening? Or does the ceiling need attention because of a leak or structural issue? This diagnosis determines the right sequence of work and helps prevent unnecessary repairs.
Ceiling repair Den Haag: choosing the right repair method
Filling stable hairline cracks
A small, stable crack may be repaired with a suitable filler or joint compound. The surface is prepared by removing loose material and creating a sound edge. Depending on the crack and substrate, reinforcement tape may help reduce the risk of the line reappearing. The repair is then filled, dried, sanded where appropriate and prepared for decoration.
Repairing damaged plaster
Where plaster is loose or hollow, the weak material must be dealt with before a new finish is applied. A professional checks how far the damaged area extends and whether the substrate is sound. The affected section can then be repaired with a compatible plaster system. Feathering the repaired area into the existing surface helps reduce visible transitions.
Repairing plasterboard joints
Cracks along plasterboard joints may result from movement, damaged tape or an unsuitable previous repair. The joint needs to be checked before new compound is applied. Loose tape and compound may need removal, followed by suitable joint tape and several controlled coats. Rushing the drying process can cause shrinkage or visible lines after painting.
Skimming or replastering a larger area
When many patches are scattered across a ceiling, repairing each one separately may leave an uneven finish. A skim coat or wider replastering work can create a more consistent surface, provided the existing ceiling is stable and suitable. The ceiling height, substrate condition and required finish all affect the best option.
Priming and painting after the repair
Decoration should begin only when the repaired materials are sufficiently dry. Use a suitable primer where the surface or product system requires it. Primer helps manage differences in porosity between old and new areas. Then apply an appropriate ceiling paint, following the manufacturer’s instructions for coverage and drying time. Check the finish from several angles and under both daylight and artificial light.
Preparing for ceiling repair Den Haag
A clean finish depends on more than the final coat of paint. Furniture and floors should be protected before work starts. Dust, loose paint and other contaminants need to be removed using methods suitable for the surface. The ceiling must be dry and stable before filling, plastering or painting begins.
Pay attention to edges around light fittings, coving, ventilation openings and wall junctions. These details can reveal gaps and uneven lines after the main surface has been finished. Electrical fittings should be handled safely; isolate power where required and use a qualified electrician for electrical work. Do not cover ventilation openings or compromise access to services.
Lighting also affects how a ceiling looks. A surface that appears smooth from the centre of a room may show ridges near a window or under recessed lights. Inspect the repaired area from different positions before furniture and coverings are removed.
Cost and timescale for ceiling repair Den Haag
The cost of a ceiling repair Den Haag project depends on the size of the damaged area, the cause and the condition of the substrate. A small, stable crack is usually less involved than widespread loose plaster or a ceiling affected by a leak. Access can also affect labour and preparation, particularly in rooms with high ceilings or fixed furniture.
Additional work may be required if damaged material needs to be removed, the substrate needs treatment or the source of moisture must be repaired first. The finish also matters. A local patch may be appropriate in one room, while a full skim and repaint may be needed to achieve a consistent appearance across a larger ceiling.
Ask for a written quotation that explains the work included. It should identify the repair area, preparation, materials, finishing coats, protection and clean-up. Clarify whether leak investigation, electrical work, specialist material testing or other trades are excluded. Comparing quotations is easier when the scope is clearly described.
Allow realistic drying time between stages. Plaster, filler, primer and paint each have product-specific requirements. Applying another coat too early can cause poor adhesion, uneven colour or other finish defects. A reliable schedule allows the materials to dry as directed rather than trying to force the process.
A practical checklist for ceiling repair Den Haag
- Document the damage. Photograph cracks, stains, peeling paint and loose sections.
- Look for the cause. Check for leaks, condensation, movement or a weak substrate.
- Stop if materials are suspect. Do not drill, sand or remove possible asbestos-containing materials.
- Define the repair area. Decide whether the work is local filling, plaster repair, joint repair or a wider skim.
- Compare clear quotations. Check preparation, materials, finishing, exclusions and clean-up.
- Plan access and protection. Prepare the room and allow time for each drying stage.
- Inspect the finish. Check edges and the full surface in daylight and artificial light.
This sequence keeps diagnosis, repair and decoration in the right order. It also makes it easier to identify which work belongs to a plasterer, painter, roofer, plumber or other specialist.
Common mistakes to avoid
- Painting over a damp stain. The moisture source may remain and the stain can return.
- Covering loose plaster. New material cannot provide a dependable finish over an unstable layer.
- Treating every crack in the same way. A stable hairline crack is different from a growing or structural crack.
- Ignoring drying times. Rushed work can lead to shrinkage, poor adhesion and uneven paint.
- Removing unknown old materials. Have suspect materials assessed before disturbing them.
- Choosing only by the lowest price. An unclear scope can leave preparation or finishing work out of the quotation.
A competent contractor should be able to explain why a particular repair method is suitable. Ask for clarification when an estimate skips inspection or does not specify the finish. A clear scope protects both the homeowner and the person carrying out the work.
Ceiling repair Den Haag: how Renova Creative can help
Renova Creative offers home improvement services in Den Haag, including plastering and painting. These services can be relevant when a ceiling needs surface preparation, plaster finishing or repainting. The correct scope depends on the cause and extent of the damage, so the first step is to describe the issue and arrange an appropriate assessment.
For a ceiling repair Den Haag enquiry, share clear photographs, explain whether there has been a leak and describe any previous repairs. This information helps establish whether the work may involve plastering and painting or whether another specialist should investigate first. Leaks, structural concerns and possible asbestos require the appropriate specialist assessment before cosmetic work proceeds.
Explore the available plastering and painting services, view the Renova Creative project portfolio or contact the team about your ceiling to discuss the next step.
Frequently asked questions about ceiling repair
Can I repair a small ceiling crack myself?
A small, stable hairline crack may be suitable for a simple filler repair. First check that it is not growing and that the surrounding surface is sound. Wider, recurring or diagonal cracks should be assessed before filling.
Can a water stain simply be painted over?
No. The source of the moisture must be found and fixed first. The ceiling should then dry fully before repair and decoration. Painting over a damp area can lead to recurring stains and adhesion problems.
When does a ceiling need replastering?
Replastering may be appropriate when large areas are loose, badly damaged or uneven. Local repairs may be enough for isolated defects. The condition and adhesion of the existing plaster determine the right approach.
How long does ceiling repair take?
The timescale depends on the size of the area, the type of damage and the drying time of the materials. A small repair may be completed relatively quickly, while extensive plastering and decoration can take several days or longer. A site inspection gives a more reliable schedule.
Can the ceiling be painted after plaster repair?
Yes, once the repair material is sufficiently dry and the surface has been prepared. The correct primer and ceiling paint depend on the substrate and product system. Follow the manufacturer’s instructions and allow each coat to dry.
Start with the cause, then restore the finish
A smooth ceiling begins with a sound surface. Cracks, moisture marks and loose plaster should be inspected before cosmetic work starts. Once the cause is understood, the repair can be matched to the ceiling, followed by suitable preparation and decoration.
Need help with a ceiling in Den Haag? Contact Renova Creative to discuss the condition of the surface and the work you have in mind. A clear assessment is the first step towards a durable, tidy finish.
